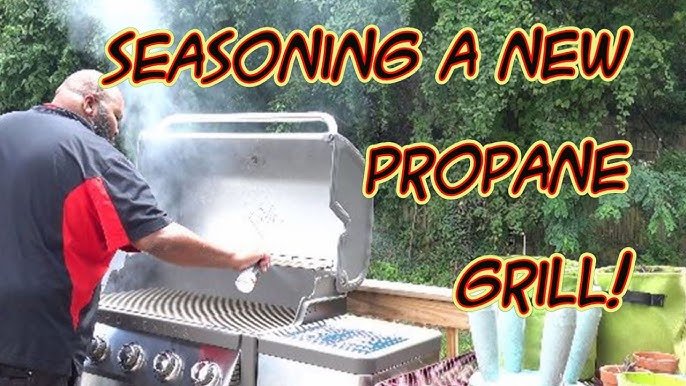
Welcome to the world of grilling! Before you fire up your new grill, there’s an important first step you must take: seasoning.
This process isn’t about herbs and spices; it’s about preparing your grill for its first cookout. Seasoning a grill is critical. It helps in preventing rust, creating a non-stick surface, and ensuring flavors are at their best. Got a new grill?
Great! Now, let’s get it ready to deliver delicious, perfectly cooked meals. Seasoning isn’t just for pans; it’s for grills too. This step-by-step guide will show you how. It’s not hard. With a few items and a bit of time, your grill will be set for success. Think of seasoning like a warm-up for your grill, prepping it to perform and making sure your food tastes amazing. Ready to start? Let’s walk through the process of getting your grill in top-notch condition for that first sizzling barbecue feast.
Introduction To Grill Seasoning
Welcome to the world of grilling! Before you fire up your new grill, there’s an essential first step – seasoning. This process isn’t about herbs and spices. It’s about preparing your grill for its first cookout. Seasoning creates a non-stick surface and prevents rust. Let’s walk through how to season a new grill properly.
The Importance Of Seasoning Your New Grill
Think of seasoning your grill as creating a foundation. It’s a one-time task that sets the stage for countless barbecues. Seasoning protects your investment. It extends the life of your grill. It also improves the flavor of your food. A well-seasoned grill means better-tasting meals.
What You Need To Know Before Starting
Gather the right tools before you begin. You’ll need a high-smoke point cooking oil, clean rags, and heat-resistant gloves. Ensure the grill is assembled according to the manual. Read safety instructions. Know your grill’s material. Cast iron and stainless steel have different needs. Be ready to give your grill time and attention during this process.
Choosing The Right Seasoning Oil
Selecting the right seasoning oil is crucial for prepping a new grill. Opt for high smoke point oils to ensure a perfect non-stick surface. Follow our step-by-step guide to season your grill effortlessly.
Choosing the right seasoning oil is a key step in prepping a new grill. The oil you pick affects your grill’s performance and the taste of your food. Let’s dive into what oils to consider and their pros and cons.Types Of Oils To Consider
Many oils work well for seasoning grills. Each has its own benefits. Common options include canola, vegetable, and flaxseed oil. Canola and vegetable oils are easy to find and affordable. Flaxseed oil, though pricier, creates a durable, non-stick surface.Pros And Cons Of Common Seasoning Oils
Canola and vegetable oils heat up well. They create a good coating on the grill. But, they can smoke a lot at high temperatures. Flaxseed oil, on the other hand, has a high smoke point. This means less smoke. Yet, it’s more expensive and not as readily available. Choosing the right oil depends on your needs. Think about availability, price, and how often you use your grill. Each oil has its benefits. Pick one that suits your grilling style and budget.Initial Cleaning Of The Grill
Before firing up your new grill, a proper initial clean is key. This first step ensures your grill is safe and ready for cooking. Let’s dive into the process of getting your grill spotless.
Removing Manufacturing Residues
New grills often have residues left from the manufacturing process. These can affect food taste and safety. A thorough clean removes these unwanted elements. It preps your grill for that first cookout.
Tools And Materials For Cleaning
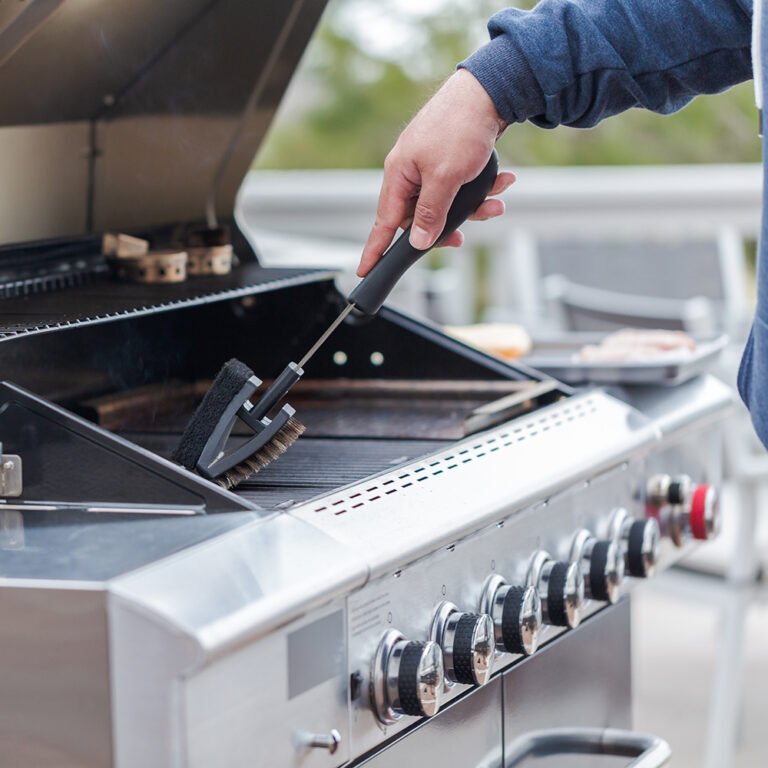
Gather the right tools and materials before you start. You will need gentle soap, warm water, a soft cloth, and a non-abrasive scrubber. With these in hand, you’re set to begin the cleaning process.
Applying The Oil
Before firing up your new grill, it’s essential to season it. This process involves coating the grill grates with oil. Seasoning creates a non-stick layer and protects against rust. Let’s dive into the proper techniques for oil application.
Techniques For Even Oil Application
For a perfect seasoning, spread oil evenly across the grill grates. You can use a basting brush or a paper towel. Hold the brush or towel with tongs to avoid burns.
- Choose the right oil with a high smoke point.
- Coat all surfaces, including corners and edges.
- Wipe off excess to prevent drips and flare-ups.
Safety Tips During Oil Application
Safety comes first when you work with grills and oil. Always keep a safe distance from the grill. Wear gloves to protect your hands.
- Ensure the grill is cool and not turned on.
- Keep a fire extinguisher nearby, just in case.
- Avoid oil contact with open flames.
Follow these steps to season your grill safely and effectively.
Heating Up The Grill
Before cooking on a new grill, heating it up is key. This step cleans it and makes it ready for food. Let’s explore how to do this right.
Determining The Correct Temperature
First, know the right temperature. For gas grills, aim for 500°F. For charcoal grills, wait until coals are ashy white. This heat kills germs and prepares the surface.
Duration Of The Heating Process
Next, let’s talk time. Keep the grill on high for 20-30 minutes. This burns off factory residues. After, use a brush to clean the grates. Now, your grill is ready for cooking.
| Grill Type | Temperature | Time |
|---|---|---|
| Gas | 500°F | 20-30 minutes |
| Charcoal | Ashy Coals | 20-30 minutes |
- Check the manual for specific instructions.
- Use a grill brush for cleaning.
- Repeat before each use for best results.
Remember, proper heat makes your grill last longer and food taste better. Follow these steps for a great start.

After The First Burn
Seasoning a new grill is crucial for flawless cooking. Follow our step-by-step guide to ensure your first barbecue is a success.
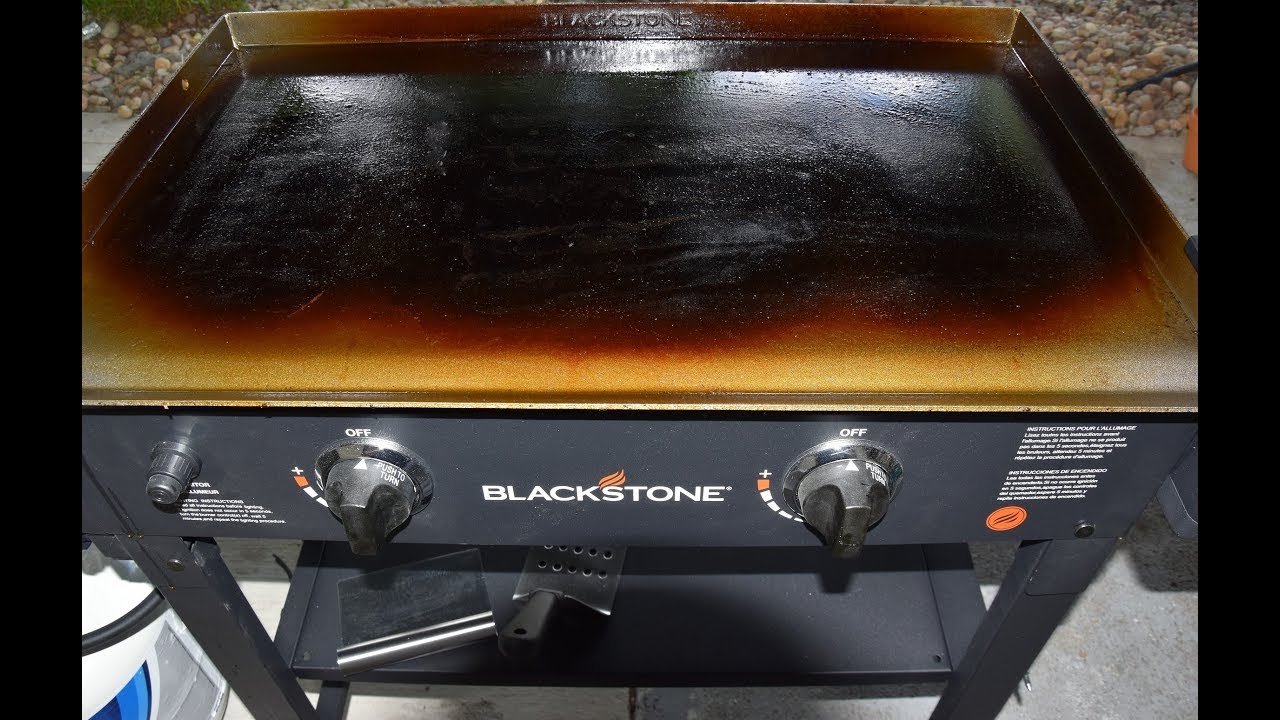
Your new grill just had its first burn. It’s a key step to get your grill ready. Now, the grill’s inside is coated with oil and the heat has done its job. The surface should now be dark and slick. This is good. It means your grill is better at cooking and less food will stick.
Post-seasoning Grill Care
Care for your grill after seasoning is simple. Let the grill cool down. Use a brush to clean the grates. No water, no soap. Just a brush. Then, wipe the grates with a cloth. This keeps them non-stick. Do this after every use. Your grill stays in top shape for years.
Common Mistakes To Avoid
Don’t leave your grill dirty. Food bits left on grates can ruin seasoning. Don’t skip the oil. After cleaning, coat the grates lightly with oil. This fights rust. Avoid harsh cleaners. They can strip the seasoning off your grill. Stick to gentle cleaning. Your grill will thank you.
Additional Seasoning Rounds
Let’s dive into the ‘Additional Seasoning Rounds’ for your new grill. A well-seasoned grill promises delightful flavors and a non-stick cooking surface. Sometimes, one round isn’t enough. More rounds might be essential for that perfect seasoning.
Deciding If Your Grill Needs More Seasoning
Look at your grill’s surface after the initial seasoning. Is it shiny and slick? That’s good. If not, it needs another round. Check for any dry spots or rust. These are signs to go again. The goal is a dark, shiny surface.
Repeating The Seasoning Process
Ready for round two? Let’s repeat the process. Clean the grill first. Wipe it down. Make sure it’s dry. Now, apply a thin layer of oil. Use a cloth or brush. Cover all surfaces. Don’t miss any spots. Next, heat the grill up. Aim for the same temperature as before. Let it bake for 30 to 60 minutes. This locks in the seasoning. Let it cool down. Check the surface again. More rounds? If yes, repeat these steps until it’s perfect.
Remember, patience pays off. Each seasoning round enhances your grill’s performance. It ensures a non-stick surface. It prevents rust. This means better grilling each time. So, take the time to do it right. Your taste buds will thank you.
Maintaining Your Grill Post-seasoning
After seasoning your new grill, taking good care of it is key. Proper maintenance ensures it stays in top shape for cooking. Let’s dive into how to keep your grill performing its best.
Regular Cleaning And Upkeep
Clean your grill after each use. This means brushing the grates and emptying the grease trap. A clean grill means better-tasting food. Use a grill brush for the grates. Wipe the outside with a damp cloth. Check for loose parts or rust often. Fix any issues right away.
When To Re-season Your Grill
Re-season your grill once a year. This keeps the cooking surface non-stick and rust-free. If you grill often, consider re-seasoning more frequently. Signs you need to re-season include food sticking or rust spots. Follow the initial seasoning steps to keep your grill in prime condition.
Seasoning Cast Iron Grill Accessories
Seasoning your cast iron grill accessories is crucial. It prevents rust and creates a non-stick surface. With proper care, these tools can last a lifetime. Let’s dive into the process.
Special Considerations For Cast Iron
Cast iron is durable but needs attention. Avoid soaking it and clean it right after use. Always dry it immediately to prevent rust. Now, let’s get it seasoned.
Step-by-step Guide For Cast Iron Seasoning
- Wash the grill accessories with warm, soapy water.
- Rinse thoroughly to remove all soap.
- Dry completely with a towel.
- Apply a thin layer of high smoke point oil. Use a cloth or brush.
- Heat your grill to 375-400°F (190-204°C).
- Place the accessories inside. Let them bake for at least an hour.
- Turn off the grill. Let the accessories cool down inside.
- Repeat the oiling and heating process 2-3 times.
Once seasoned, maintain the coating. Always oil the surface after cleaning. This care keeps your grill accessories in top shape.
Troubleshooting Common Seasoning Issues
Seasoning a new grill can be tricky. Sometimes, things don’t go as planned. You might notice flaking or stickiness. Maybe the seasoning looks uneven. Don’t worry. These common issues have simple fixes. Let’s tackle them step by step.
Dealing With Flaking Or Sticky Surfaces
Flaking or sticky surfaces can ruin a good seasoning. This often happens due to too much oil or heat. Here’s what to do:
- Clean the grill grates to remove any debris.
- Apply a thin, even layer of high-smoke point oil.
- Heat the grill slowly to avoid burning the oil.
If stickiness persists, the grill may need a do-over. Wipe it clean. Start fresh with a lighter oil coat.
Addressing Uneven Seasoning
Uneven seasoning can affect cooking results. It’s often a sign of poor oil coverage or inconsistent heat. Here’s a fix:
- Ensure the grill is level to avoid pooling oil.
- Use a brush for even oil application.
- Rotate the grates during the seasoning process to distribute heat.
Check the grill’s temperature. Aim for a medium heat. This helps the oil bond evenly.
Maximizing Grill Performance And Longevity
Seasoning a new grill is key to great cooking and long life. It prevents rust, improves food flavor, and makes cleaning easier. Like a cast-iron skillet, it needs care. Follow these steps to keep your grill in top shape for years.
Best Practices for Grill UsageBest Practices For Grill Usage
Regular maintenance will keep your grill ready for the next BBQ. Here’s how:
- Clean after each use while it’s warm.
- Check for propane leaks once a month.
- Replace grates when worn or rusty.
- Keep the lid closed when not in use.
- Use proper tools to avoid scratching surfaces.
Protecting Your Grill From The Elements
Weather can damage your grill. Protect it with these tips:
- Cover it with a waterproof cover when not in use.
- Store in a dry place during off-season.
- Remove snow and ice to prevent rusting.
- Avoid direct sunlight to prevent fade.
Conclusion: Enjoying Your Well-seasoned Grill
You’ve followed the steps to season your new grill. Now, it’s time to enjoy the fruits of your labor. A well-seasoned grill promises better-tasting meals. It also ensures your grill stays in top shape for years to come.
The Rewards Of Proper Seasoning
Seasoning is like a rite of passage for your grill. It’s the foundation of great grilling. Proper seasoning prevents rust and creates a non-stick surface. You get to savor juicy burgers and perfectly charred veggies. The flavors improve with each cookout. Your grill becomes a trusty partner in your culinary adventures.
Next Steps In Your Grilling Journey
With your grill seasoned, it’s time to explore new recipes and techniques. Try different rubs and marinades. Host a barbecue party. Share your grilling skills with friends and family. Keep your grill clean after each use. Regular maintenance will keep your grill ready for the next feast. Happy grilling!
Frequently Asked Questions
Why Season A New Grill Before First Use?
Seasoning a new grill creates a non-stick surface and prevents rust. Heating the grill with a high-smoke point oil forms a protective layer. This ensures your food tastes better and your grill lasts longer.
What’s The Best Oil To Season A Grill?
High-smoke point oils like canola, vegetable, or grapeseed oil are best for seasoning grills. These oils can withstand high temperatures without burning, creating an ideal non-stick surface.
How Long Does Grill Seasoning Take?
Seasoning a grill typically takes around 15 to 30 minutes. Apply oil, heat the grill on high for 15 minutes, let it cool, and repeat if necessary. This process ensures a well-seasoned cooking surface.
Can I Use Olive Oil To Season My Grill?
It’s not recommended to use olive oil for seasoning grills due to its low smoke point. High-smoke point oils are preferable as they create a better seasoning layer without burning off quickly.
Conclusion
Seasoning your new grill is simple and essential. Follow these easy steps for best results. Clean the grill first; it prepares the surface. Next, oil it well to create a non-stick layer. Heat it as instructed to set the seasoning.
Remember, regular maintenance keeps your grill in top shape. Happy grilling and enjoy delicious, perfectly cooked meals every time!

