Grilling outside is a favorite activity for many. It brings friends and family together for good food and fun.
Imagine taking this experience up a notch with a DIY outdoor BBQ station that suits your style and space. Tailoring your own grilling area can be both rewarding and enjoyable, turning your backyard into the ultimate gathering spot. With a touch of creativity and some basic tools, you can transform your outdoor cooking experience.
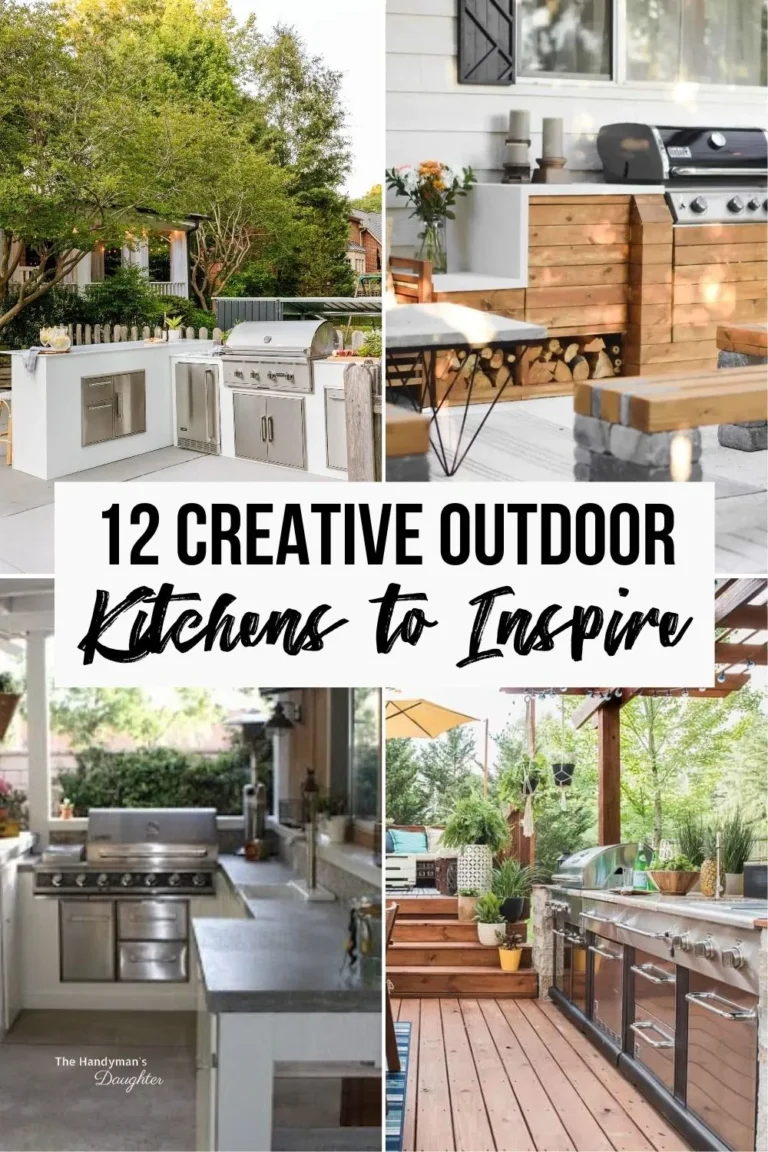
Building your own BBQ station adds a personal flair to every meal. It’s not just about the taste of barbecued food, but also the joy of creating a space where memories are made. This guide will show you eight simple yet effective outdoor BBQ stations that you can make. You don’t need to be a pro; just some materials, a bit of time, and a sprinkle of enthusiasm are enough. Let’s get ready to craft a backyard masterpiece that will make your neighbors peek over the fence in awe. Get set to grill in style – your DIY outdoor BBQ adventure starts here!
Introduction To Diy Bbq Stations
DIY BBQ stations are perfect for outdoor cooking enthusiasts. They turn backyards into functional spaces. With creativity, you can design a station that fits your style and needs. It’s a practical project with a personal touch.
Benefits Of Building Your Own
Cost savings and customization are key benefits of DIY BBQ stations. You control the budget and design. These stations also enhance outdoor living and can boost property value.
- Save money
- Personalize to taste
- Improve outdoor space
- Increase home value
Tools And Materials Needed
Building a BBQ station requires basic tools and materials. Ensure you have everything before starting.
| Tools | Materials |
|---|---|
| Hammer | Bricks or blocks |
| Drill | Mortar or adhesive |
| Saw | Wood planks |
| Level | Grill insert |
| Screwdriver | Countertop material |
Simple Grill Cart Station
Building a Simple Grill Cart Station is easy and useful. It lets you cook outside with ease. This DIY project is perfect for those who love outdoor cooking. Let’s dive into how to make one.
Blueprint And Measurements
First, gather your materials. You’ll need wood, screws, and wheels. The size depends on your grill. A standard size is 48 inches wide, 24 inches deep, and 36 inches high. This fits most grills.
- Wood: Choose weather-resistant types like cedar or redwood.
- Screws: Use outdoor-grade to avoid rust.
- Wheels: Get two that lock to keep your station in place.
| Material | Quantity | Notes |
|---|---|---|
| Wood (planks) | 8 | Cedar or redwood |
| Screws | 50 | Outdoor-grade |
| Wheels | 4 | 2 locking |
Step-by-step Assembly
- Cut the wood according to the measurements.
- Build the frame. Screw the planks together to form a rectangle.
- Add the shelves. These hold your cooking tools.
- Attach the wheels. Two should lock to keep the station still.
- Finish. Sand and paint or stain your grill cart.
Now, your Simple Grill Cart Station is ready. Enjoy cooking outdoors!
Pallet Wood Bbq Stand
Imagine a unique BBQ stand that stands out in your backyard. A Pallet Wood BBQ Stand does just that. This DIY project upcycles old pallets into a functional and stylish BBQ station. It’s budget-friendly and eco-conscious. Let’s dive into how you can transform pallet wood into your new BBQ stand.
Recycling Pallets For Your Grill
Old pallets can find new life as your BBQ stand. First, ensure pallets are safe and not chemically treated. Look for the ‘HT’ stamp, which means heat-treated. Clean them well. Sand down rough edges. Now, you’re ready to build.
Assembly Instructions
Start with a good plan. Measure your grill and space. Cut pallets to fit these dimensions. You’ll need a hammer, nails, and maybe a saw. Secure the pallets together to form a countertop and lower shelf. Attach wheels for easy movement. With some effort, your Pallet Wood BBQ Stand will be ready for your next cookout.
Modern Concrete Bbq Counter
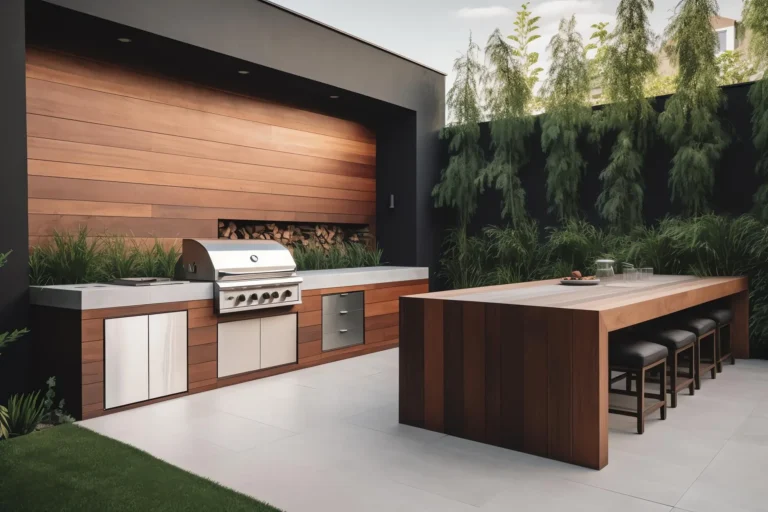
Outdoor cooking gets a sleek upgrade with a Modern Concrete BBQ Counter. Picture a sturdy, stylish space where grilling is a breeze. This BBQ station is not just about utility; it’s a style statement. Its clean lines and industrial vibe can turn any backyard into a chic culinary haven. Let’s dive into crafting your own concrete countertop and tips to nail that contemporary look.
Creating A Concrete Countertop
Building a concrete countertop means durability meets design. First, you need a mold. Use melamine boards for this. They’re smooth and won’t stick to the concrete. Next, mix concrete and pour it into the mold. Be sure to tap the sides to remove air bubbles. Once it’s dry, carefully remove the mold. You now have a solid base for your outdoor BBQ station.
Design Tips For A Contemporary Look
For a modern touch, keep it minimal. Choose a neutral color palette—think grays, blacks, and whites. Add a matte finish sealer for a subtle sheen. Straight lines are key. Ensure the front of your BBQ counter is flush and the edges are crisp. For hardware, go with stainless steel for a clean look. Think about lighting too. LED strips under the countertop can create a warm glow. Ready to grill in style?
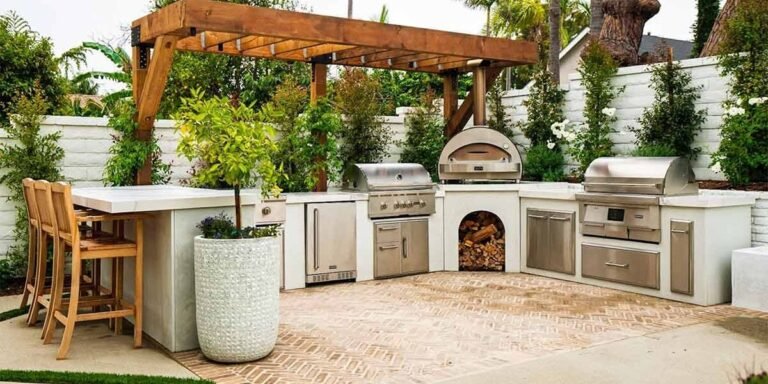
Rustic Brick Bbq Island
Creating a Rustic Brick BBQ Island can be a fun project. This type of BBQ station adds charm and warmth to any outdoor space. Let’s dive into how you can build one yourself.
Brick Laying Techniques
Building with bricks might seem hard, but it’s doable. First, pick the right bricks. You need ones that can handle heat well. Start by laying a solid foundation. This will keep your BBQ island stable. Use a level tool to make sure each brick layer is straight. Mortar is like glue for bricks. Apply it carefully between each brick. Let each layer dry before adding another. This process takes time and patience.
Customizing Your Brick Island
Make your BBQ island unique. Think about adding a wood storage area under it. This is practical and looks good. You can also design spaces for tools and plates. Some people even add a small fridge nearby. Choose a countertop that matches the rustic look. A stone top works well. Don’t forget about lighting. Good lighting makes your BBQ island more inviting at night.
- Choose heat-resistant bricks
- Build a solid foundation
- Use a level tool
- Apply mortar correctly
- Add personal touches
A Rustic Brick BBQ Island brings beauty to your yard. It’s also a great place to cook and hang out. Follow these steps to build one that lasts.

Portable Barrel Grill Station
Discover the charm of homemade barbecue with a portable barrel grill station. Perfect for outdoor cooking, this DIY project is a fun weekend activity.
Outdoor cooking brings fun to any gathering. A Portable Barrel Grill Station is perfect for this. It’s a clever twist on classic barbecue setups. Let’s dive into creating one with a touch of DIY spirit.Repurposing An Old Barrel
Finding an old barrel is step one. Metal barrels work best. Clean it up. Cut it in half, longways. This makes your grill base. Make sure to sand any rough edges. Safety first. Next, attach a grill grate. You can find one at any hardware store. Now you have a grill surface.Mobility Features And Setup
A grill must move easily. Add wheels to one end of your barrel. Handles on the other end help too. This way, you can tilt and roll your grill. Choose a spot in your yard. Set up your grill station. Enjoy a cookout with friends and family. It’s simple, effective, and fun.Sleek Metal Bbq Trolley
A Sleek Metal BBQ Trolley stands out in any outdoor setting. It’s stylish and practical. Perfect for those who love grilling. Let’s dive into how to make one.
Metal Work Basics
Starting with metal work, it’s simpler than it seems. You need basic tools. A welder, grinder, and some metal sheets. Safety is key. Always wear gloves and goggles. Measure twice, cut once. This ensures a perfect fit. Practice makes perfect. Start with small projects.
Incorporating Storage And Accessories
Storage is essential. Think about shelves and hooks. They hold tools and spices. Add a side table. It holds plates and sauces. Wheels make it mobile. Now, moving your BBQ trolley is easy. Enjoy grilling anywhere in your yard. This trolley keeps everything within arm’s reach.

Stone Veneer Grill Oasis
Imagine a backyard centerpiece that turns heads and cooks incredible meals. The Stone Veneer Grill Oasis does just that. It’s a durable, stylish DIY BBQ station. With stone veneer, it blends rustic charm with modern function. Let’s dive into creating this outdoor showstopper.
Applying Stone Veneer
Stone veneer gives a high-end look without the weight. It’s easy to handle. Start with a solid base, like cement board. Use mortar to attach the veneer pieces. Press firmly and let it set. Keep the surface clean and flat. This way, your grill station lasts for years.
Incorporating A Smokehouse Feature
Love smoked flavors? Add a smokehouse to your grill oasis. Build it into the design from the start. Use metal boxes for the smoking chamber. Connect it to the grill area. Make sure to have good ventilation. Now you can smoke meats and veggies anytime.
Foldable Space-saving Grill Station
Maximize your outdoor area with a foldable grill station. Compact and functional, it’s perfect for small patios. Enjoy the freedom to set up a BBQ wherever you wish, then simply fold and store away. This solution brings both convenience and versatility to your outdoor cooking experiences.
Designing For Small Spaces
Begin with a clear plan. Measure your available space. Choose materials that withstand the outdoors. Opt for lightweight options to ensure easy folding and storage. A foldable station can transform tiny areas into a BBQ spot.
Building A Foldable Station
Start with a sturdy base. Attach hinges for easy folding. Add a work surface that’s heat-resistant. Include hooks for tools and a shelf for spices. Ensure stability when unfolded. Your DIY foldable grill station is now ready for action!

Finishing Touches And Maintenance
Now that your DIY outdoor BBQ station stands ready, it’s time to focus on the finishing touches and maintenance. These final steps ensure longevity and ease of use. Protection from the elements and regular cleaning will keep your station in top condition. Let’s dive into how to shield your pride and joy from weather wear and tear and keep it sparkling clean with minimal effort.
Weatherproofing Your Station
Outdoor stations face sun, rain, and wind. Treat wood surfaces with a sealant. It blocks moisture and UV damage. Metal parts need rust-resistant paint or coating. For countertops, use outdoor-rated materials. They withstand temperature changes better. Cover your BBQ station when not in use. It’s an easy step to keep it dry and clean.
Cleaning And Care Tips
Regular cleaning prevents buildup and extends your station’s life. After each use, wipe down surfaces and clean grills. Use mild soap and water for most materials. Avoid harsh chemicals. They might harm the finish. Stainless steel benefits from special cleaners. They maintain its shine and prevent fingerprints. For winter, store any removable parts indoors. It helps avoid cold damage.
Frequently Asked Questions
What Materials Are Best For Diy Bbq Stations?
Building a DIY BBQ station often involves durable, weather-resistant materials. Brick, concrete, and stainless steel are popular choices. They withstand outdoor conditions well and offer a solid foundation. Each material has its advantages, such as brick’s aesthetic appeal and steel’s durability.
How Do I Protect My Outdoor Bbq Station From Weather?
Protecting your BBQ station involves using weatherproof materials and covers. Applying a waterproof sealant to wood and stone surfaces can prevent damage. For added protection, invest in a durable, waterproof BBQ cover. Regular maintenance, like cleaning and checking for wear, also extends its lifespan.
Can I Build A Bbq Station On A Budget?
Yes, building a budget-friendly BBQ station is possible with careful planning. Opt for cost-effective materials like reclaimed wood or bricks. Consider a simpler design that requires fewer materials and less labor. Doing the work yourself, sourcing second-hand or discounted materials, and gradually enhancing your station can also save money.
What Size Should My Diy Bbq Station Be?
The size of your DIY BBQ station should match your needs and available space. A basic station might only need a few square feet for a grill and small countertop. For more extensive cooking and entertainment features, plan for at least 10 to 15 square feet.
Measure your space and consider your cooking habits before deciding.
Conclusion
Crafting your own outdoor BBQ station adds a personal touch to summer cookouts. It’s a project that brings fun, function, and flair to your backyard. These eight DIY ideas we shared are just the start. Pick one, gather your tools, and enjoy the process.
Your next BBQ could showcase a station that’s all your own making. Friends and family will love the unique space you create. So, roll up your sleeves and let’s start building. A memorable summer filled with delicious grilling awaits!