Picture this: juicy, fall-off-the-bone BBQ ribs that leave your taste buds dancing. Achieving this level of perfection on the grill is an art form.
Mastering tender BBQ ribs is not just about the cooking time or the sauce you slather on. It’s about technique. Whether you’re a backyard BBQ enthusiast or a first-timer, getting those ribs just right can seem daunting. Don’t worry, we’ve got you covered.
This post will guide you through seven tried-and-true techniques to ensure your ribs are the star of any cookout. From selecting the right cut to the final, flavor-packed bite, these methods will simplify the process. Get ready to impress your friends and family with ribs that are nothing short of perfection. Let’s fire up the grill and dive into the secrets of mouthwatering BBQ ribs!

Introduction To Tender Bbq Ribs
Succulent, tender BBQ ribs draw crowds and spark joy at any gathering. Mastering the art of perfectly barbecued ribs is a journey worth taking. The right techniques transform simple ribs into a mouth-watering feast. This guide reveals seven methods to ensure your ribs are the highlight of the day.
The Allure Of Barbecued Ribs
Barbecued ribs have a special place on the grill. Their smoky aroma and rich flavors captivate senses. The sight of caramelized sauce on a rib rack promises a delightful experience. Ribs done right become the star of any BBQ.
Key Factors For Rib Perfection
Several key factors play a role in achieving rib perfection. Meat quality, preparation, and cooking time matter. Patience and the right tools also make a big difference. Follow these steps and watch your ribs go from good to great.

Selecting The Best Rib Cut
Selecting the Best Rib Cut is key for tender BBQ ribs. Different cuts offer unique flavors and textures. Knowing which cut to choose makes all the difference. Let’s dive into the details.
Types Of Ribs: A Comparison
Three main rib types exist: Baby Back, Spare, and St. Louis. Each has its own features.
- Baby Back Ribs – Lean and tender. They cook quickly.
- Spare Ribs – Larger and have more fat. They are flavorful.
- St. Louis Style Ribs – Trimmed spare ribs. They have a uniform shape.
What To Look For When Buying Ribs
Choosing the right ribs is crucial. Here are tips for buying:
- Meat quality – Look for fresh, pink ribs. Avoid dark spots.
- Marbling – Fat within the meat adds flavor. Look for some marbling.
- Size – Ensure ribs are uniform for even cooking.
- Smell – Fresh ribs should not have a strong smell.
Remember, the right cut and quality make perfect ribs. Choose wisely.
Preparation Essentials
Perfectly tender BBQ ribs start with proper preparation. Before you fire up the grill or smoker, understanding the right techniques is crucial for mouth-watering results. Here are the preparation essentials every rib master should follow.
Trimming And Removing The Membrane
Rib trimming is vital for even cooking. Remove excess fat and meat scraps. A sharp knife is your best friend here. Next, membrane removal is a must. It’s the layer on the rib’s underside. Peel it off for better seasoning absorption and texture.
Marinating: Flavor Infusion Techniques
Marinating ribs infuses deep flavors. Use a mix of spices, acids, and liquids. Place ribs and marinade in a sealed bag. Let sit in the fridge. Overnight is best for flavor depth.
| Prep Step | Tools Needed | Time Required |
|---|---|---|
| Trimming Fat | Sharp Knife | 5-10 minutes |
| Removing Membrane | Paper Towels | 5 minutes |
| Marinating | Sealable Bag | 4-24 hours |
- Trim away unwanted fat.
- Peel the membrane for tenderness.
- Marinate for rich flavor.
Seasoning Secrets
Let’s dive into the art of seasoning for mouthwatering BBQ ribs. The right mix can transform good ribs into great. It’s all about the secrets of seasoning. We’ll explore homemade versus store-bought rubs and how to balance spices for the perfect flavor.
Homemade Rubs Vs. Store-bought
Creating a homemade rub gives you control. You choose what goes in. This means fresh, quality ingredients without added preservatives. Store-bought rubs are convenient. They save time and offer consistent flavor. Yet, homemade rubs can elevate your ribs with a personal touch.
Balancing Spices And Herbs
Balance is key in seasoning. Start with a sweet base like brown sugar. Add salt for depth. Paprika brings a smoky note. Garlic powder and onion powder offer savoriness. Don’t forget a kick from black pepper or cayenne. Test and adjust. The right balance makes all the difference.
The Low And Slow Cooking Method
The Low and Slow Cooking Method is a key to tender BBQ ribs. This technique takes time but gives meat that falls off the bone. Let’s dive into how to do it right.
Temperature Control Tips
Keeping the heat just right is crucial. Aim for 225-250 degrees Fahrenheit. This range is perfect for ribs. Use a reliable thermometer to check. This helps avoid overcooking. Keep the lid closed as much as possible. This keeps the temperature stable.
Timing Your Cook For Optimal Tenderness
Patience pays off with ribs. Cook them for about 4-5 hours. Not rushing is the secret. This time allows the meat to become tender. Check the meat’s texture after 4 hours. It should easily pull away from the bone. Let the ribs rest for 10 minutes before serving. This makes them even more tender.
Moisture Management
Moisture Management is key to tender BBQ ribs. It’s about balance. Ribs need moisture to stay juicy but too much makes them soggy. Learn the tricks to keep ribs tender and flavorful.
Wrapping Techniques: Foil Vs. Butcher Paper
Two popular ways to lock in moisture are foil and butcher paper. Here’s how they compare:
- Foil: Traps moisture well. It steams ribs for softness. But it can soften the bark too much.
- Butcher Paper: Breathable. It keeps ribs moist but not wet. The bark stays firm.
Choose based on your texture preference. Foil for softer ribs, paper for firmer bark.
Basting And Mopping: Keeping Ribs Juicy
Basting and mopping are techniques to add moisture during cooking. They help ribs stay juicy.
| Basting | Mopping |
|---|---|
| Apply sauces or liquids with a brush. It adds flavor and moisture. | Use a mop to dab on a thin liquid. It keeps ribs wet without overpowering. |
Do this every hour. It prevents drying out and adds layers of flavor.
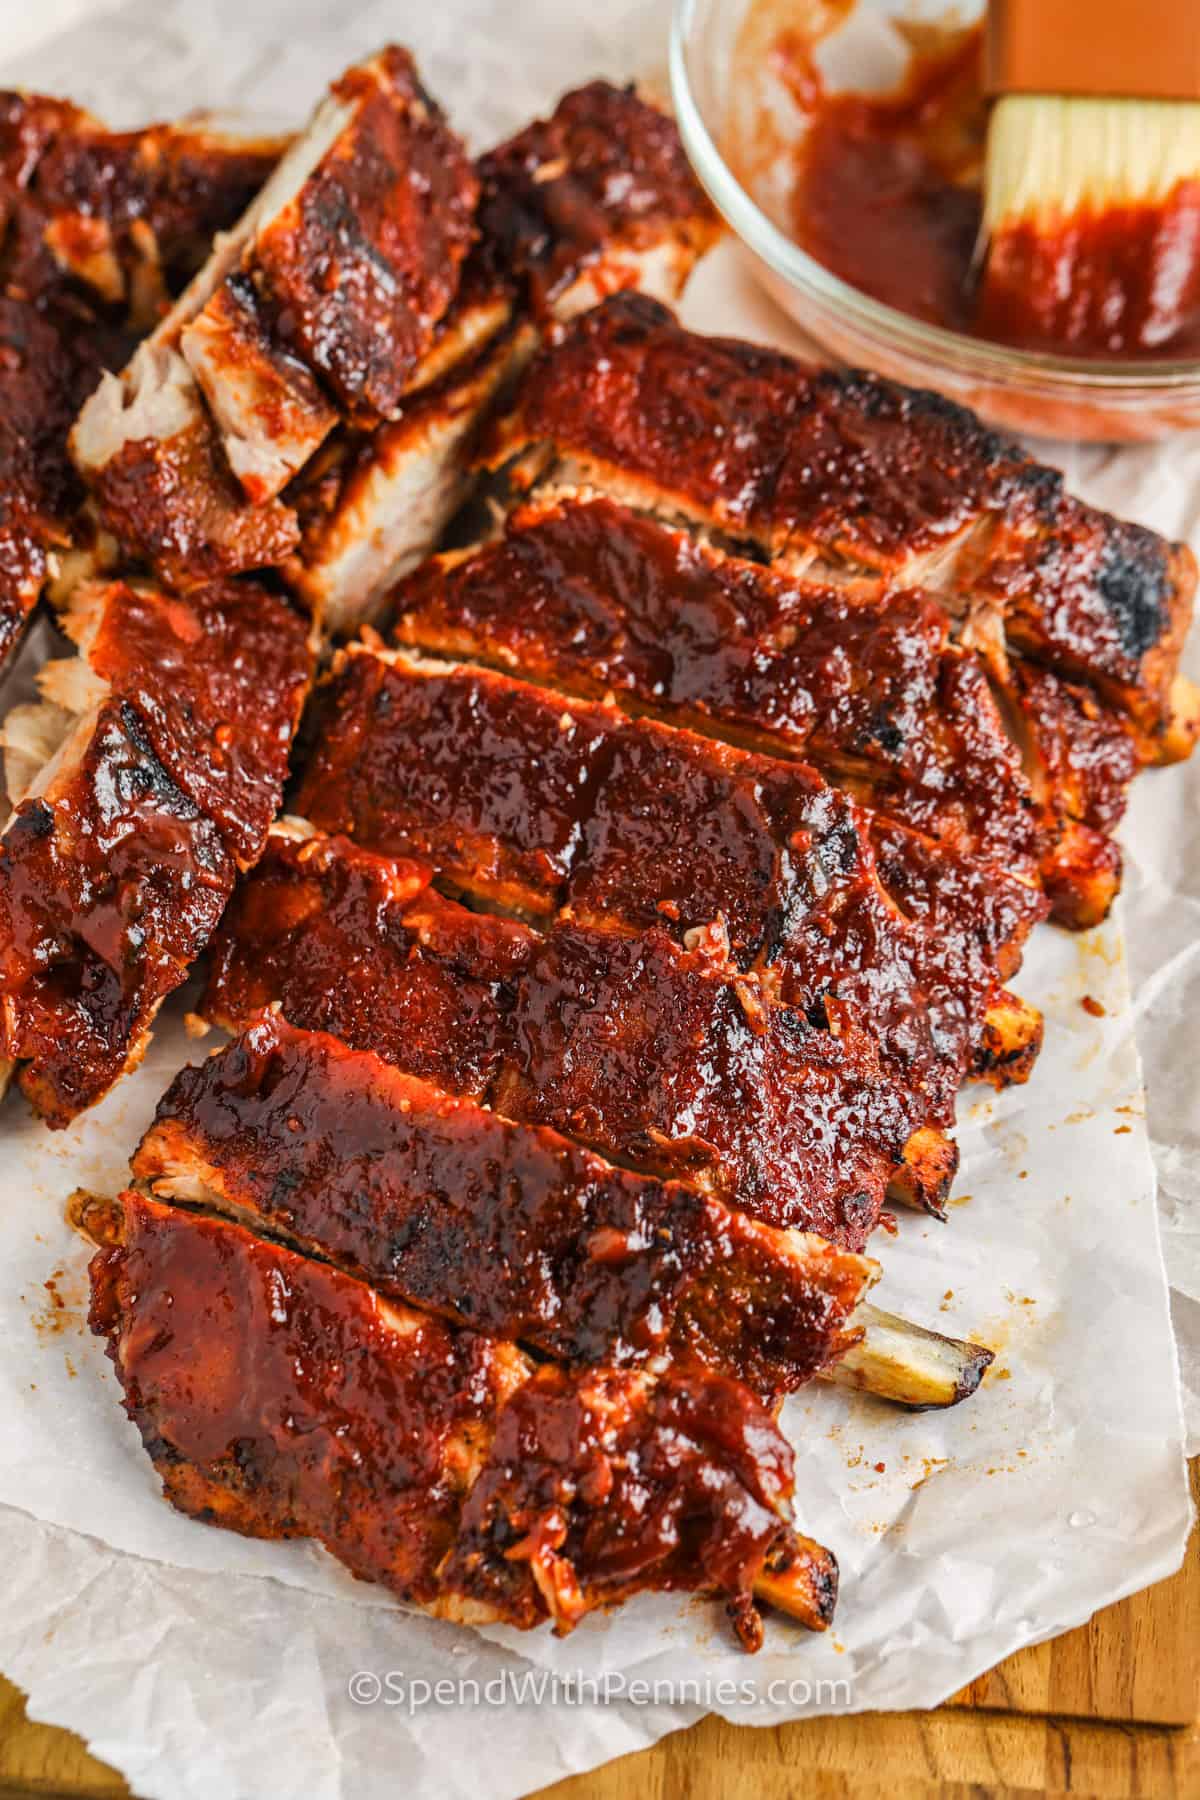
Sauce Application Strategies
Discover the art of tender BBQ ribs with our sauce application strategies. Master the secrets to juicy, fall-off-the-bone meat by exploring seven easy techniques.
Applying sauce to BBQ ribs is an art. It adds flavor and moisture. Here are strategies to get it right.
Choosing The Right Bbq Sauce
Not all sauces fit all ribs. The sauce should match the meat’s flavor. Sweet sauces go well with pork. Spicy sauces suit beef ribs. Quality matters. Choose sauces with natural ingredients. They enhance the ribs’ taste. Avoid too much sugar. It can burn easily.
- Match sauce to meat type.
- Use quality sauces.
- Avoid high sugar content.
Best Times To Apply Sauce
Timing is key. Apply sauce too early, and it might burn. Too late, and it won’t stick. Brush sauce on ribs during the last 30 minutes of cooking. This time frame allows the sauce to caramelize without burning. For a thicker glaze, add multiple layers. Wait 5-10 minutes between applications.
- Apply in the last 30 minutes of cooking.
- For thick glaze, add more layers.
- Wait 5-10 minutes between layers.
Remember, practice makes perfect. Enjoy the process of making tender, saucy BBQ ribs.
Testing For Doneness
Testing for Doneness is crucial to serving up BBQ ribs that are the talk of the town. Nailing the perfect level of tenderness can seem like an art. But, with the right techniques, anyone can check if their ribs are ready to be devoured. Let’s dive into some tried-and-true methods.
The Toothpick Test
Ribs ready? The toothpick test is a quick way to tell. Just poke a toothpick between the rib bones. If it slides in with little resistance, the ribs are done. The toothpick should glide as if through soft butter.
Visual And Tactile Cues
Look and feel can say a lot about rib readiness. Ribs should have a slight give under pressure and meat should pull back from the bone ends. A perfect rack will show about a half-inch of bone. The surface should be caramelized with a rich, mahogany color. Touch the ribs, and they should be tender, but not falling apart.
Resting And Serving
After hours of smoking, your BBQ ribs are nearly ready to tantalize taste buds. But before serving, there’s a crucial step: resting and serving. Properly resting ribs ensures juices redistribute, resulting in tender and flavorful meat. Let’s dive into how to rest ribs and present them for a truly mouthwatering experience.
The Importance Of Resting Ribs
Think of resting as the final touch to your BBQ masterpiece. It’s a must for peak flavor and tenderness. Here’s why:
- Locks in moisture: Rest allows juices to settle.
- Continues cooking: Ribs carry on cooking gently.
- Improves texture: Fibers relax, becoming tender.
Wrap ribs in foil and rest them for at least 10 to 15 minutes. They stay hot and become juicier.
Cutting And Presentation Tips
Now for the grand reveal! A few tips for that perfect cut:
- Use the right tools: A sharp knife is key.
- Slice between bones: Look for natural separations.
- Keep it intact: Serve as a slab or individual ribs.
For presentation, lay ribs on a platter. Garnish with herbs. Serve with sides like coleslaw and cornbread. Your guests will love the look and taste.
Troubleshooting Common Pitfalls
Mastering BBQ ribs takes practice, but knowing how to tackle common issues makes all the difference. Let’s explore some key techniques to keep your ribs tender and avoid those all-too-common BBQ blunders.
Avoiding Overcooking
Tender ribs are a must. Overcooking is the enemy.
- Use a meat thermometer. Aim for 145°F (63°C) inside.
- Check ribs after 3 hours. Every grill is different.
- Wrap ribs in foil. It keeps them moist.
- Rest ribs for 10 minutes. Juices settle back in.
Dealing With Flare-ups And Uneven Cooking
Flare-ups burn ribs. Uneven heat cooks them wrong. Here’s what to do:
- Keep a spray bottle handy. Water douses flames.
- Move ribs around. Some grill spots are hotter.
- Use indirect heat. Ribs cook slow and steady.
- Trim excess fat. Less fat, fewer flare-ups.
Pairings And Side Dishes
A plate of succulent BBQ ribs calls for the perfect partners on the side. These pairing choices not only complement the main dish but also round out the meal, making it truly memorable. Let’s dive into some classic sides and drinks that promise to elevate your BBQ experience.
Complementary Sides For Bbq Ribs
Cornbread, a sweet and crumbly delight, pairs perfectly with ribs. Its slight sweetness balances the smoky BBQ flavor. Potato salad, creamy and tangy, also makes for a refreshing contrast. For a healthier twist, coleslaw adds a crisp texture. Don’t forget baked beans, simmered in a sauce that echoes the ribs’ savory notes.
Beverage Pairings To Enhance The Experience
Drinks play a big role in a BBQ. A cold beer, its bitterness cutting through the fat, refreshes the palate. For wine lovers, a zesty Zinfandel complements the ribs’ richness. Fancy a non-alcoholic option? Iced tea with lemon cleanses the taste buds and quenches thirst like no other.
Conclusion: Mastering The Art Of Bbq Ribs
Perfect BBQ ribs are a craft, a blend of patience, technique, and passion. Grasp these methods, and the reward is delicious, fall-off-the-bone ribs. Let’s wrap up what you’ve learned and encourage you to bring your personal touch to this BBQ classic.
Recap Of Key Techniques
- Choose the right ribs – Select meaty, well-marbled cuts.
- Prep properly – Remove the membrane and season generously.
- Low and slow cooking – Patience yields tender results.
- Moisture is key – Keep ribs moist with a spritz or mop sauce.
- Wrap for tenderness – Foil or butcher paper locks in flavor.
- Finish with a glaze – Add a final touch of sweet and sticky sauce.
- Rest before serving – Let flavors meld and juices redistribute.
Encouragement To Experiment And Personalize
Now, take these tips and make them your own. Every grill master starts somewhere. Try different rubs, woods, and sauces. Each choice shapes the ribs’ taste and texture. Your perfect rib recipe is out there. Go and find it. Enjoy the journey!
Frequently Asked Questions
What’s The Best Temperature For Bbq Ribs?
The ideal cooking temperature for BBQ ribs is around 225°F to 250°F. This low and slow approach ensures the ribs become perfectly tender. It allows the connective tissues to break down without drying out the meat.
How Long Should You Marinate Ribs Before Bbq?
Marinate your ribs for at least 1 hour before BBQing, but for the best flavor, leave them marinated overnight. This allows the meat to absorb the flavors fully, enhancing the taste and tenderness of the ribs.
Can You Overcook Bbq Ribs?
Yes, it’s possible to overcook BBQ ribs. While slow cooking is key to tenderness, cooking beyond the meat reaching an internal temperature of 195°F to 203°F can make the ribs mushy rather than perfectly tender.
What’s The Secret To Tender Ribs?
The secret to tender ribs lies in proper preparation and cooking technique. Removing the membrane, marinating or applying a rub, and cooking them slowly at a low temperature are crucial steps. Wrapping them in foil can also help retain moisture.
Conclusion
Achieving tender BBQ ribs is no small feat, but it’s well worth the effort. The techniques we’ve shared are your roadmap to success. Remember, patience is key and each step has its purpose. From choosing the right meat to mastering the cook time, your path to delicious ribs is clear.
Use these tips next time you fire up the grill. Your taste buds will thank you, and so will your guests. Perfect ribs are just a cook away. Ready, set, grill!