Grilling season brings the joy of outdoor cooking to many. A DIY BBQ island can make it even better.
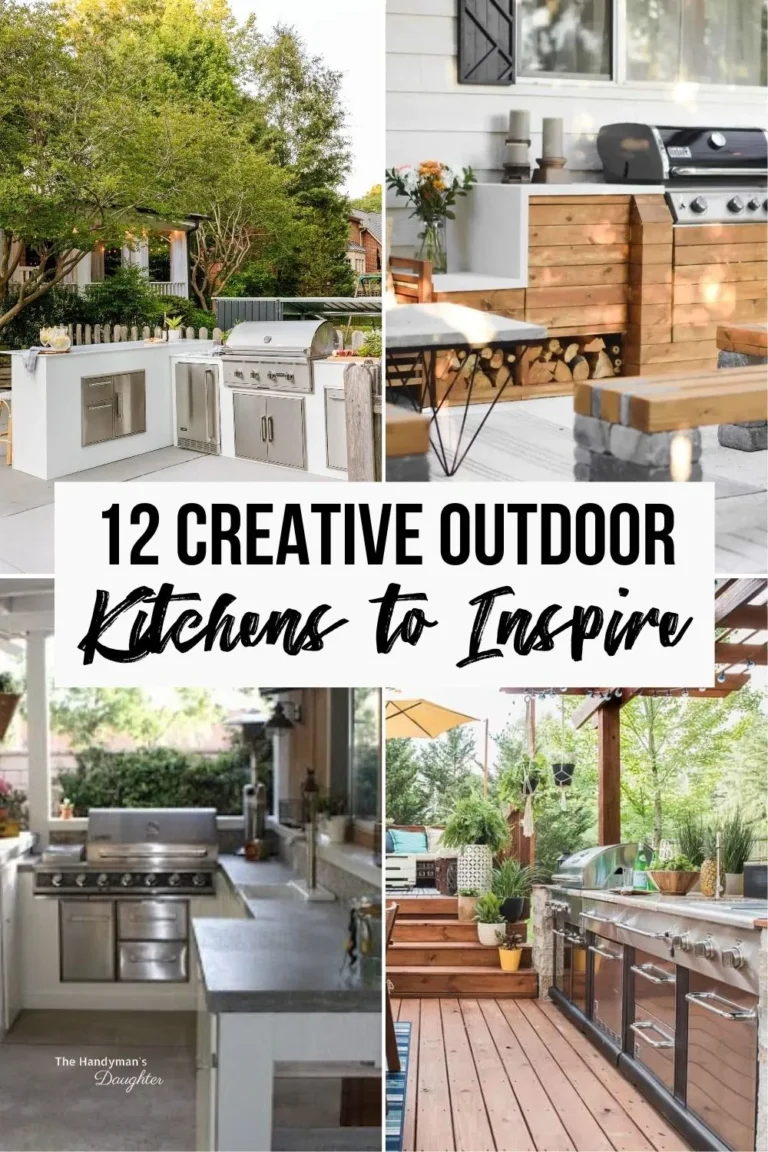
Imagine creating a space where friends and family gather, sharing food and laughter. Building a BBQ island doesn’t need to break the bank. This blog post will explore 12 affordable DIY BBQ island ideas perfect for beginners. Each idea promises to add charm and function to your backyard without the hefty price tag.
We’ll guide you through simple yet stylish projects that can transform your outdoor cooking experience. Whether you have a spacious backyard or a modest patio, there’s an idea here for you. Get ready to turn your grilling dreams into reality, one brick, and one plank at a time. Let’s dive into these budget-friendly builds that are sure to impress and entertain.
Introduction To Diy Bbq Islands
Imagine summer evenings, the smell of grilled food wafting through the air. A DIY BBQ island turns this dream into reality. Crafting a BBQ island by yourself is not only rewarding but also cost-effective and customizable. Let’s dive into why a DIY approach could be the best choice for you.
Why Choose Diy?
Freedom to create and flexibility in design are key. You pick materials and features that fit your budget. Plus, the satisfaction of building something with your own hands is unmatched.
Benefits Of Having A Bbq Island
- Entertainment: A hub for gatherings
- Value: Increases home desirability
- Convenience: Everything you need at arm’s reach
Basic Materials And Tools
Building a DIY BBQ island adds fun and value to your backyard. Beginners need the right materials and tools. This guide helps you start.
Essential Materials List
Materials matter for a sturdy BBQ island. Here’s what you need:
- Bricks or concrete blocks – for the base.
- Wood – for framing.
- Metal bars – for reinforcement.
- Concrete mix – to bind blocks.
- Mortar – for brick walls.
- Tile or stone – for the countertop.
- Grill – the main part.
Tools You’ll Need
Right tools make the job easier. Here are the basics:
- Tape measure – for accurate measurements.
- Shovel – to prepare the ground.
- Level – for even surfaces.
- Masonry saw – to cut bricks.
- Trowel – for mortar application.
- Drill – for assembling wood frames.
- Screwdriver – to fasten parts together.
Planning Your Bbq Island
Building a BBQ island adds flair to outdoor gatherings. It’s a project you can tackle. Let’s plan your dream BBQ space with affordable, easy ideas. Read on for design tips and space measuring advice.
Design Considerations
Consider function and style when choosing a BBQ island design. Think about cooking needs and seating arrangements. Choose materials that suit your climate and budget. Look for designs that match your outdoor decor. Here are key points:
- Choose a layout that fits your cooking style.
- Pick materials that are durable and weather-resistant.
- Opt for storage options to keep tools handy.
- Include seating if you plan to entertain guests.
Measuring Your Space
Start by measuring your outdoor area. This ensures your BBQ island fits well. Use a tape measure to record the length and width of the space. Consider the following:
| Area | Length | Width |
|---|---|---|
| BBQ Zone | ___ feet | ___ feet |
| Seating Area | ___ feet | ___ feet |
| Pathways | ___ feet | ___ feet |
Record these numbers. They guide your DIY project. Ensure enough space for guests to move around. Leave room for future upgrades or additions too.
Simple Wood Frame Island
Building your own Simple Wood Frame Island is a great DIY project. It’s perfect for those who enjoy outdoor grilling. Plus, it’s budget-friendly and doable for beginners. Let’s dive into how you can construct a basic frame and protect it from the elements.
Building A Basic Frame
Start with a plan. Measure your space and decide on dimensions. Gather materials like lumber, screws, and tools. Assemble the base first, ensuring each corner is square. Add supports for stability. Attach a countertop of your choice. Your frame is now ready.
Weatherproofing Tips
Wood needs protection from rain and sun. Start by choosing treated lumber. Apply a water-resistant sealant. Consider a cover for when not in use. Regular maintenance keeps your island safe and looking good for years.
Using Pavers For A Sturdy Base
Building a DIY BBQ island adds fun and value to your outdoor space. Using pavers for a sturdy base is a smart, affordable choice. Pavers are durable and easy to work with. Perfect for beginners. Let’s explore how to use them.
Laying The Foundation
Start with a solid foundation. It’s key for a lasting BBQ island. First, choose a flat spot. Clear the area of grass and debris. Next, lay a layer of gravel. This helps with drainage. Compact the gravel firmly. Now, add a layer of sand. Level the sand carefully. This prepares the ground for pavers.
Assembling Paver Structures
Now, build the base with pavers. Place the first layer of pavers on the sand. Check that they are level. Use a rubber mallet to adjust. Add layers of pavers. Apply concrete adhesive between layers for strength. Leave spaces for your grill and storage. Finally, fill gaps with sand. This secures the pavers.
- Choose flat spot and clear it.
- Lay gravel, then sand. Compact and level.
- Place first pavers. Check level.
- Add layers with adhesive. Leave spaces.
- Fill gaps with sand.
Building with pavers is simple and cost-effective. It creates a strong base for your BBQ island. Follow these steps for a successful project.
Repurposing Old Furniture
Thinking of building a BBQ island on a budget? Don’t buy new. Look around your home. You might find old furniture perfect for a BBQ setup. It’s about being creative and saving cash. Let’s turn that old dresser into a trendy BBQ island!
Selecting Suitable Furniture
Start with solid wood pieces. They’re sturdy and can handle the outdoors. Think old cabinets, tables, or dressers. They should be big enough for grilling tools and supplies. Make sure they’re not wobbly. A stable base is key for a safe BBQ island.
Modification Steps
First, clean the furniture. A good scrub will do. Then, sand it down. This preps it for paint or sealant. Next, cut out space for the grill if needed. Make sure the grill fits snug. Lastly, add wheels for easy movement. Now, you’ve got a mobile BBQ island!
Incorporating Concrete Countertops
Building a BBQ island adds fun to outdoor cooking. A key part? Concrete countertops. They’re strong and look great. Here’s how beginners can add them.
Mixing And Pouring Concrete
Start with the right mix. Use a concrete mix for countertops. It’s available at most hardware stores. Next, measure your space. Know how big you want your countertop. Now, mix the concrete. Follow the bag’s instructions. It usually needs water. Mix until smooth.
Prepare your form. This is where you’ll pour the concrete. It shapes your countertop. Use melamine boards for smooth edges. Coat with oil. This makes removing the form easier later. Pour the concrete into the form. Use a shovel. Spread it evenly.
Remove air bubbles. Tap the sides of the form with a hammer. This helps. Let the concrete set. It takes at least 48 hours. Be patient.
Finishing Touches
After the concrete sets, remove the form. It’s time for sanding. Sand the surface. Start with coarse sandpaper. Move to finer grits. This makes the countertop smooth.
Seal the concrete. Use a concrete sealer. This protects it. Apply with a brush. Let it dry. Now, your countertop is ready. It’s strong and looks good. Perfect for your BBQ island.
Concrete countertops are a smart choice. They last long. They withstand heat. They even resist scratches. With these steps, beginners can do it. Enjoy your new BBQ island.
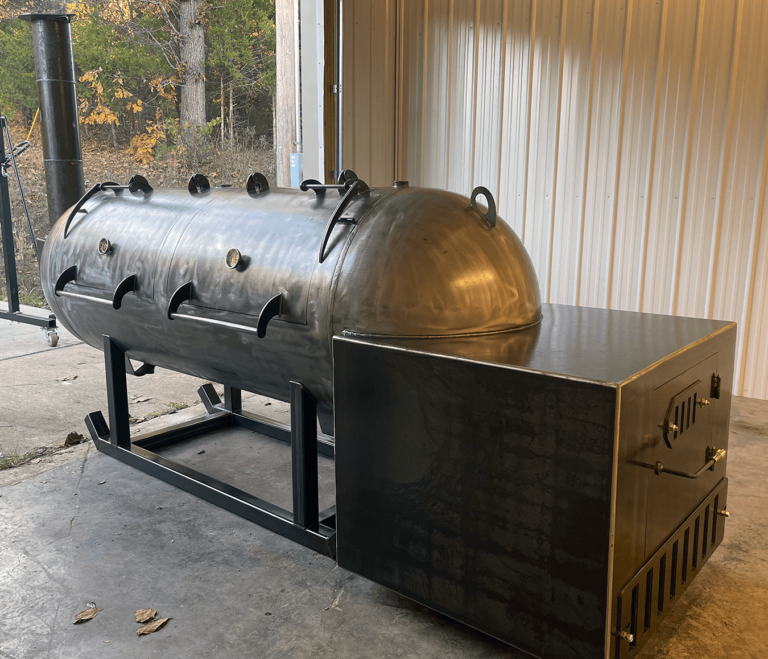
Metal Stud Framing Technique
Ready to build a DIY BBQ island? The metal stud framing technique is a standout choice for beginners. It’s budget-friendly and easier than you might think. Let’s dive into why metal studs are a smart pick for your project.
Constructing With Metal Studs
Building with metal studs means a lighter structure. It’s a simple process. Cut the studs to size, then screw them together. You create a frame for your BBQ island. No heavy lifting needed. You can even do it alone.
Advantages Of Metal Framing
Metal studs resist fire, pests, and rot. They won’t warp or shrink. Your BBQ island stays straight and true. Plus, metal is recyclable. You’re being kind to the planet while you grill.
Adding A Bar To Your Bbq Island
Adding a Bar to Your BBQ Island can transform your backyard into the ultimate entertainment space. Picture this: guests gather around, drinks in hand, as the grill sizzles. A bar addition means more fun and function for any BBQ island. Let’s explore simple, budget-friendly ways to add a bar to your setup, perfect for beginners.
Designing The Bar Area
Start with a clear plan for your bar space. Consider how many guests you’ll host and the overall layout. Your bar should offer enough room for people to sit and move around. Think about including features like a built-in cooler or shelves for glasses and drinks. Aim for a design that’s both practical and inviting.
Material Choices And Installation
Select durable, easy-to-clean materials for your DIY bar. Outdoor-friendly options like concrete blocks or reclaimed wood are popular and affordable. They can withstand the elements and look great too. For the top surface, consider using a sealed countertop to prevent water damage and stains. You’ll need basic tools and some DIY spirit to put everything together. Follow online tutorials or guides to help you through the process.
Lighting And Electrical Set-up
Turning a DIY BBQ island into a nighttime haven means getting the lighting and electrical setup right. Beginners can tackle this step without hassle. Proper lighting extends the use of your BBQ island well past sunset. A functional electrical setup powers your appliances safely. Let’s explore how to achieve this effectively.
Safe Electrical Practices
Electrical safety is key. Always choose weather-resistant materials. Use GFCI (Ground Fault Circuit Interrupter) outlets to prevent shocks. These are a must for outdoor kitchens. Ensure that all wiring is done by a certified electrician. This keeps your BBQ island safe and up to code. A simple list of tips includes:
- Use outdoor-rated fixtures
- Install GFCI outlets
- Seal all outdoor connections
- Keep electrical components away from water sources
Outdoor Lighting Options
Different lighting sets the mood and adds function. Solar-powered lights are a great choice. They’re cost-effective and easy to install. LED options offer brightness and energy savings. Consider these lighting ideas:
- Task lighting for cooking areas
- Accent lighting to highlight features
- Pathway lights for safety and style
String lights create a festive atmosphere. They drape easily and add charm. Post lights around the island ensure visibility. Choose lighting that complements your space. Remember, the goal is to blend functionality with aesthetics.
Decor And Accessories
Creating a BBQ island adds flair to outdoor cooking spaces. It’s not just about function. The right decor and accessories turn a simple grill spot into a backyard haven. Let’s explore how to style your DIY BBQ island. Think about charm and utility while selecting pieces.
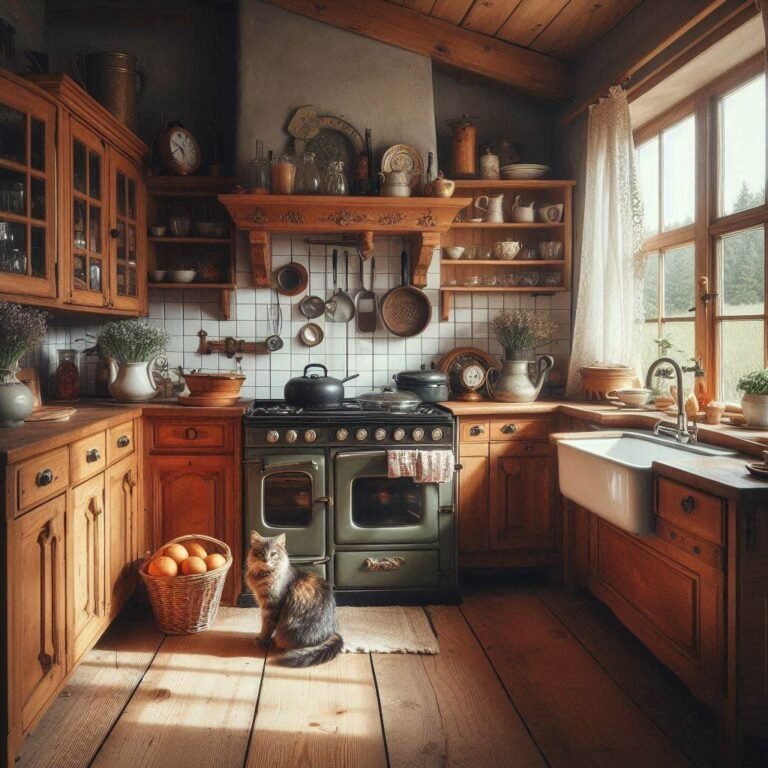
Choosing Your Style
Your BBQ island should reflect your personal taste. Love rustic themes? Go for natural wood and stone. Prefer modern looks? Choose sleek metal and neutral colors. Match your outdoor furniture for a cohesive feel. Your style sets the stage for your BBQ island.
Functional Decor Pieces
Decor can be practical too. Add hooks for tools and towels. Use durable, weather-resistant materials. Consider a magnetic knife strip. It saves space and keeps utensils handy. Potted plants bring life and color. They can also repel pests with the right herbs. A built-in bottle opener ensures no one’s ever searching. Your BBQ island can be both beautiful and smart.
Maintaining Your Bbq Island
Once you’ve built your DIY BBQ island, keeping it in top shape is key. A well-maintained BBQ island ensures longevity and safety. Let’s dive into simple yet effective ways to keep your island ready for grilling season.
Regular Cleaning Routine
Cleanliness is crucial for any BBQ island. Start with regular wipe-downs after each use. Use a grill brush for the grates. Wipe surfaces with soapy water. Don’t forget to check for grease buildup. A clean BBQ island means better tasting food and a safer cooking environment.
- After each cookout, wipe down surfaces.
- Use a grill brush for grates.
- Check and clean grease traps often.
Protecting From The Elements
Outdoor elements can harm your BBQ island. Sun, rain, and wind can wear it down. Use a waterproof cover to shield it. This prevents rust and damage. In winter, secure the cover to protect against snow and ice.
| Action | Benefit |
|---|---|
| Cover with waterproof material | Prevents rust and wear |
| Secure cover in place | Stops wind and snow damage |
Remember to check your BBQ island before and after the season. Look for any signs of wear or damage. Fix small issues before they grow. With these tips, your BBQ island will be a lasting part of your backyard.
:strip_icc()/patio-eating-area-grill-pizza-oven-9lGhhYdlqJO9XMkPaZEawB-7d8c8a8b9ba2482fa905a8600b9df8ff.jpg)
Frequently Asked Questions
What Is A Diy Bbq Island?
A DIY BBQ island is a self-made outdoor kitchen feature. It typically includes a grilling area and sometimes areas for storage and food preparation. By building it yourself, you can customize its size, materials, and layout to perfectly fit your outdoor space and cooking needs.
How Much Does Building A Diy Bbq Island Cost?
The cost of building a DIY BBQ island can vary widely. It depends on the materials, size, and appliances you choose. On average, a basic setup might start around a few hundred dollars, using budget-friendly materials and mainly manual labor.
More elaborate designs with high-end materials and appliances can cost more.
Can Beginners Build A Bbq Island?
Yes, beginners can build a BBQ island with the right planning and tools. Starting with simple designs and using prefabricated modules can make the process easier. There are also numerous tutorials and plans available that cater to different skill levels, guiding you through each step.
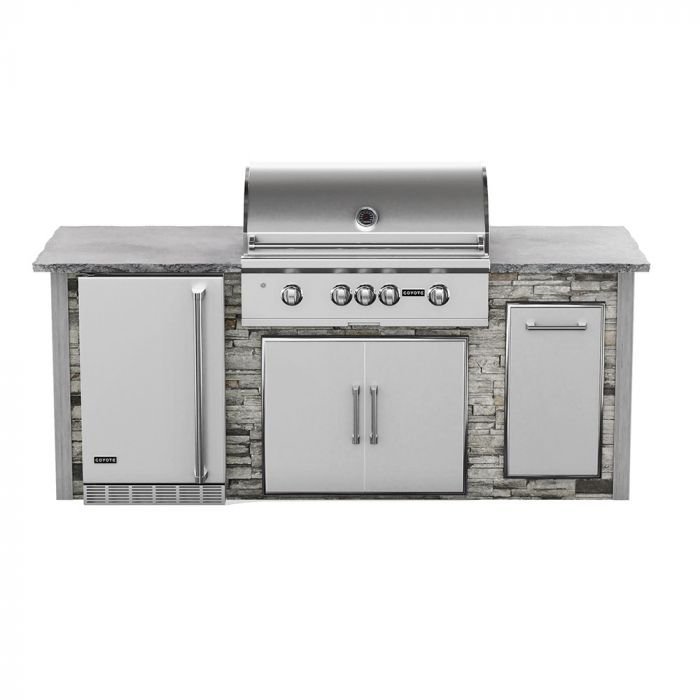
What Materials Are Best For A Diy Bbq Island?
For durability and weather resistance, materials like steel frames, concrete blocks, and exterior-grade plywood are popular choices. For finishing touches, stucco, tile, or stone veneers can be used. These materials not only stand up to outdoor conditions but also offer a range of styles to match your backyard décor.
Conclusion
Embracing DIY BBQ island projects can be a rewarding experience. With these 12 affordable ideas, beginners have a solid starting point. You don’t need deep pockets or expert skills. Start small, get creative, and watch your backyard transform. These ideas are proof that with some effort, anyone can create a great BBQ space.
So grab your tools and let your imagination lead the way. Your next outdoor gathering could be a hit with a BBQ island you built yourself. Ready, set, grill!